16. K19 DSP function instruction

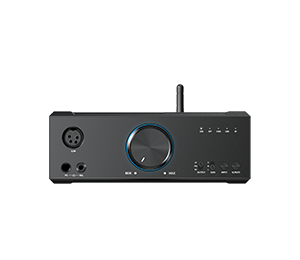
When connecting the computer to the K19 via a USB cable, be sure to connect the USB port marked RS232 on the rear panel of the K19. Other USB ports do not support connection with the DSP.

The overall functional division of the DSP client is shown in the figure above:
a) DRC/DRE,compressor and Limited adjustment area
b) DSP online status
c) Settings
d) 31-band EQ parameter setting area
e) EQ switching and access operation area
f) EQ curve display area

If after opening the DSP client, it prompts that the connection failed, you can check whether the USB cable between K19 and the computer has been correctly connected, and whether it is connected to the RS232 USB port on K19. After confirming that the connection is correct, you can close the prompt window and click the "Connect" knob in the upper right corner to reconnect.

You can also check whether there is a device named "USB-Enhanced-SERIAL CH343" in the computer's device manager after connecting to the computer. If not, it means that the K19 is not correctly connected to the computer and you need to recheck the hardware connection status.

If you need to switch the language, you can click the menu knob as shown above, select "Language/语言", and switch the 中文 or English display as needed.
1. DRC/DRE,compressor and Limited adjustment area

The parameters in this area are divided into 3 parts, from top to bottom, namely dynamic adjustment, compression adjustment and limiter adjustment. The small circle in the upper left corner of each section is the reset button. When you need to reset parameters, click this button to restore the parameters to default.
1.1 Dynamic Adjustment

The main function of this part is to improve or reduce the dynamic performance of the track.
DRCDRE THR: Dynamically adjust the start level. When the detected signal size reaches the set threshold (usually less than the set value), the function will take effect.
DRCDRE Attack: When the signal duration meets the start level setting threshold, the function takes effect.
DRCDRE Release: The signal does not meet the start level setting threshold, and when the duration reaches this set value, the function fails.
DRCDRE Ratio: Dynamically adjust the parameter proportion. The larger the value, the greater the adjustment range.
DRCDRE Depth: Dynamically adjust the size setting. When this parameter is a negative value, it will reduce the dynamic performance of the track (a simple understanding is to reduce the output amplitude); when this parameter is a positive value, it will improve the dynamic performance of the track (a simple understanding) That is to increase the output amplitude).
1.2 Compression adjustment

The main function of this part is to limit the maximum output amplitude as a whole and perform overall attenuation based on the current maximum signal to avoid sound breakage and distortion caused by excessive amplitude.
Comp THR: function enable trigger threshold.
Comp Attack: When the signal duration meets the start level setting threshold, the function takes effect.
Comp Release: The signal does not meet the start level setting threshold, and when the duration reaches this set value, the function fails.
Comp Ratio: After triggering the compression limiting function, the compression amplitude is set. The larger the value, the greater the reduction.
1.3 Limiter adjustment

The main function of this part is to limit the maximum output amplitude as a whole to avoid sound breakage and distortion caused by excessive amplitude.
Limiter THR: function enable trigger threshold.
Limiter Attack: When the signal duration meets the start level setting threshold, the function takes effect.
Limiter Release: The signal does not meet the start level setting threshold, and when the duration reaches this set value, the function fails.
1.4 The difference between compression adjustment and limiting adjustment
From a functional point of view, compression adjustment and limiting adjustment are both used to limit the maximum output amplitude of the signal, but they are slightly different: compression adjustment is an overall limitation. For example, in the range of 20Hz~20kHz, it is detected that the current 1kHz has been triggered. By setting the compression threshold, the output signal will reduce the overall amplitude of all signals in the full frequency range of 20Hz to 20kHz, which is equivalent to reducing the overall volume of the K19. Under the same conditions, if only 1kHz reaches the limiting adjustment threshold, the output signal will only limit the output amplitude of 1kHz, and other frequency bands will remain unchanged, maintaining the original output size.
2. EQ parameter setting instructions

This area is the main parameter section for EQ adjustment. There are a total of 31 levels of EQ parameters available for adjustment. You can change the parameters through interface buttons, push buttons, arrows, etc. to adjust the parameter configuration that meets your own requirements. Each section can set the PEQ type, gain value, frequency value, and Q value parameters.
2.1 PEQ type
PEQ is mainly divided into 3 types:

Type 1: PEQ - Peak EQ. In this mode, frequency point adjustment will only affect the frequency amplitude at the current frequency point and its sides, as shown in the figure above.

Type 2: LSEQ - Low Shelf EQ. In this mode, setting parameters will have an overall impact on the frequency below the current frequency point, as shown in the figure above.

Type 3: HSEQ - High Shelf EQ. In this mode, the set parameters will have an overall impact on the part above the current frequency point, as shown in the figure above.
2.2 Gain
This item is to adjust the output amplitude. A positive number means prompting the output amplitude, a negative number means reducing the output amplitude. The maximum can be set to +12dB and the minimum -24dB.
2.3 Frequency
This item is used to set the frequency value that needs to be adjusted.
2.4 Q value
The Q value is used to define the width of the frequency range affected by boosting. It describes the frequency range of boosting or attenuation, which is actually bandwidth. The larger the Q value, the smaller the bandwidth affected, and conversely, the smaller the Q value, the larger the bandwidth affected.
3. EQ switching and access operation instructions
3.1 EQ switch

Click the first button in the picture to pop up the EQ selection list, select any required EQ name, and K19 can switch to the corresponding EQ simultaneously (note, if you switch EQ from K19 while the DSP is connected, the DSP client will The current EQ displayed will not be refreshed, just disconnect and reconnect the DSP software). It is recommended that when the DSP client is connected, use the DSP to switch EQ first.
3.2 EQ import, export and save

When you click "EQ Export", you can save the current EQ setting parameters in the computer to form a local parameter file; click "EQ Import" again, you can import the EQ parameter file to the DSP client, and K19 will immediately follow the parameter settings. effective execution.

When the DSP client is online, if EQ is imported or modified, K19 will immediately take effect simultaneously. However, the modified data will not be stored in memory. When you need to save the parameters to K19, you can use the "EQ Save" button to save the parameters to In Custom 1~Custom 10, the original custom parameters are overwritten.
3.3 EQ Reset and Bypass

EQ reset: Reset the current EQ parameters and restore them to factory settings (Note: After resetting the EQ, the K19 will not automatically save it. You still need to manually select the save EQ to save the parameters to the K19).
EQ Bypass: Click this button to temporarily turn off the EQ function. Click it again to restore the EQ function. It is especially suitable for AB comparison listening of EQ on and off states.
3.4 RTA function

RTA is a function used to display real-time spectrum measurement and analysis of audio. K19 does not support it and you can ignore this function.
4. Description of EQ curve display area

This area can display the overall output status of the actual EQ curve. When you use the mouse to drag the digital dots in the area, you can quickly adjust the EQ parameters.


