





























19. How to upgrade the firmware on the AIR AMP?
1.Local upgrade
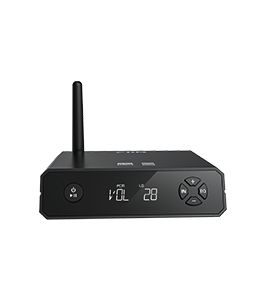
The AIR AMP can be upgraded via a USB drive using a compressed firmware package (.zip file). Copy the upgrade package to the root directory of the USB drive, then insert it into the USB-A port or Type-C port of the AIR AMP. The AIR AMP will display "DISK IN". Then, select UPDATE in the AIR AMP menu, and the AIR AMP will automatically select the latest update package on the USB drive to complete the upgrade. After the upgrade is successful, the AIR AMP will automatically restart. You can check the current firmware version through the menu, for example: FW V123.
Important notes:
a) Do not decompress the firmware package and do not modify its name.
b) The firmware package must be copied to the root directory of the USB drive and cannot be placed in any other folder.
After the firmware upgrade, the AIR AMP's previous settings and network configuration information will not be lost, and the upgrade package on the USB drive will still be retained after the upgrade.
Upgrade error messages:
-
After clicking upgrade, if "NO DISK" appears, it means the USB drive cannot be detected or no USB drive is inserted. Try reinserting the USB drive or use a different USB drive to upgrade again.
-
After clicking upgrade, if "NONE" appears, it means the system cannot recognize the upgrade file. Please confirm that the correct upgrade file has been copied to the USB drive and that the file is placed in the root directory of the USB drive. (The upgrade file must be in .zip format, must not be decompressed, and the upgrade file name must not be modified.)
-
If "FAIL" is displayed during the upgrade process, it means an error occurred during the upgrade. You can reinsert the USB drive, wait 5 seconds, and then try upgrading again, or the upgrade package may be faulty. Try downloading or copying the upgrade package again.
The USB drive formats supported for AIR AMP upgrades are FAT32, exFAT, and NTFS.
2.OTA upgrade
The AIR AMP can perform an OTA upgrade directly from the network after connecting to the internet.
1.OTA upgrade through local operation
After the AIR AMP is connected to Ethernet or Wi-Fi, briefly press the menu knob on the main interface to enter the settings menu, rotate the menu knob to switch to the "OTA CHK" screen, and then briefly press the menu knob to confirm. The system will check over the network whether a firmware update is available. If the device is not connected to the network, a "NO NET" prompt will appear. If the current firmware is already the latest version, a "LATEST" prompt will appear. If a firmware update is available, an "OTA Y/N" prompt will appear. Rotate the menu knob to select Y and briefly press to confirm to enter the OTA upgrade. Select N and briefly press the knob to confirm to exit the upgrade.
2.OTA upgrade through the FiiO Control app
Install the FiiO Control app on your phone and connect both the phone and the AIR AMP to the same local network. After the phone app is connected to the AIR AMP, enter Settings, tap the "SOC Firmware Upgrade" option, and in the pop-up selection screen, select "Confirm Upgrade" to make the AIR AMP enter the OTA upgrade. If you tap "Cancel" on the selection screen, the upgrade will be exited.
How to check the SOC firmware version
1.Check on the device
On the main interface, briefly press the menu knob to enter the settings menu, rotate the menu knob to switch to the "FW Vxxx" screen. The displayed Vxxx is the current SOC firmware version.
2.Check through the FiiO Control app
Install the FiiO Control app on your phone and connect both the phone and the AIR AMP to the same local network. After the phone app is connected to the AIR AMP, enter Settings and find the "SOC Firmware Upgrade" option, where the current firmware version will be displayed.

